Triple Quests
Triple quests are unique challenges added by the Goatperson DLC. They are accessible via the Goat Glade. The first triple quest starts unlocked, and completing it unlocks the second triple quest; completing that unlocks the third.
Each triple quest is a series of three scenarios - specific map, character, special rules - however normal preparations are only available for the first such scenario of each triple quest. The second scenario starts with the finishing inventory of the first scenario; and the third, with the finishing inventory of the second. For this reason, optimal preparations for a triple quest will consider all three scenarios. Furthermore, there is a tangible incentive not to convert items during a scenario, because every item or glyph left may make the next scenario that much easier.
Triple Quest 1 - The Spider Script
Ancient carvings found throughout the Northern Desert have always been a point of curiosity for those intent on studying history. A seemingly unbreakable pedestal in an otherwise unremarkable set of ruins bears a few such carvings... and one old historian has found the means of interpreting them.
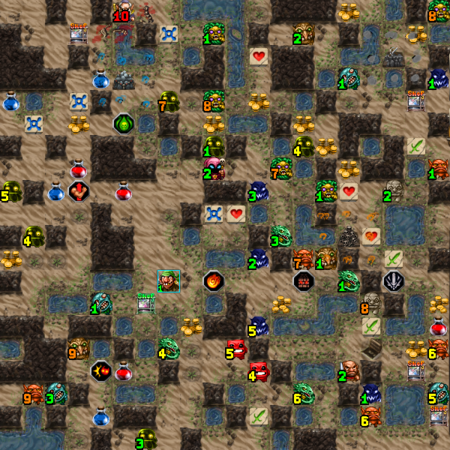
Scenario 1 - The Northern Desert
The scoundrel known only as "Junesbury" always took a special interest in arcane mysteries and historical artifacts. For this reason alone, an otherwise sparsely-scrupled ex-bandit developed a friendship with kingdom archaeologist Lemmin Tee, one of the most respected history experts outside the Administrator's small council. The dangers in the desert were present and numerous. Junesbury didn't want the old man coming to any harm.
This map resembles the Northern Desert. It starts the story revolving around the Bloodmage Order seeking to usurp the power of the gods themselves. It also serves to teach the player the Goatperson's first class trait, Herbivore.
Player Character
Junesbury, the ![]() Human Thief
Human Thief
Preparations / Resources
Preparations are allowed normally, but only for this stage. There are only four shops. Otherwise, the map has the standard assortment of glyphs, potions, gold, altars and stat boosters, and even has a random subdungeon.
Special Rules
When you kill a monster, some of the closest unbreakable (water) tiles will be removed, just like in Northern Desert. The "boss" of the map, the archaeologist Lemmin Tee is Pacifist, and according to the story, you must protect him while he deciphers the script (i.e. defeat all other monsters).
Monsters
All basic monsters will be present, as well as ![]() Desert Trolls. Monster difficulty is 100%, corresponding to Normal difficulty.
Desert Trolls. Monster difficulty is 100%, corresponding to Normal difficulty.
Boss
The boss of the dungeon has two forms.
The first form resembles a ![]() Human Sorcerer and is Pacifist. He cannot be interacted with until all monsters on the map are slain. Once the monsters are gone, speak to Lemmin and witness him complete reading the inscriptions. You will gain XP as if you have defeated a L10 monster.
Human Sorcerer and is Pacifist. He cannot be interacted with until all monsters on the map are slain. Once the monsters are gone, speak to Lemmin and witness him complete reading the inscriptions. You will gain XP as if you have defeated a L10 monster.
Then you will see the real boss, the transformed Lemmin Tee: (![]() Rusalka icon, Attack 75, Health 350, Blink, Magic Immune, Death Protection (3) )
Furthermore, the whole map will turn dark again; 50 food will be placed in your inventory; and all tiles where a monster died previously will hold 8 food. Curiously, all the food combined is *not* sufficient to re-explore the full map again, which means that if your fight with Lemmin Tee drags out for too long, you may run out of food, and starve to death. Welcome to the world of a Goatperson!
Rusalka icon, Attack 75, Health 350, Blink, Magic Immune, Death Protection (3) )
Furthermore, the whole map will turn dark again; 50 food will be placed in your inventory; and all tiles where a monster died previously will hold 8 food. Curiously, all the food combined is *not* sufficient to re-explore the full map again, which means that if your fight with Lemmin Tee drags out for too long, you may run out of food, and starve to death. Welcome to the world of a Goatperson!
Strategy
The only preparation that is recommended specifically for this first scenario is the Bear Mace, given how it makes the bossfight significantly easier. If Lemmin Tee cannot blink away, the map loses most of its danger; furthermore, the extra damage from knockback helps especially when you are going through his Death Protections. If you do not have the Bear Mace, consider pre-exploring at least half of the map, leaving several small dark patches, that you can selectively explore should Lemmin blink into one of them. Avoid leaving too vast expanses of blackspace, because should Lemmin blink too deep into blackspace, you will lose a lot of damage you previously dealt to him by the time you get to him. Keep note of his magic immunity - no spell can affect or target him!
However, do consider that the resources you bring into Scenarios 2 & 3 will partially depend on the preparations you take for Scenario 1! Therefor, it is advised to bring at least a Can of Whupaz and a Burn Salve with the intention of keeping them until the boss fight of Scenario 3. Furthermore, some Schadenfreude Potions may come very handy for the boss fight of Scenario 2. Plus, the more general Health and Mana Potions you carry on, the better you odds will be later on.
Through great resourcefulness and desperate measures, Junesbury survived both the desert and the marauding supernatural spirit that had taken hold of the dear archaeologist. Junes had witnessed both terror and mystery during all those years as a marauder. Wherever the two joined, blood magic was often afoot.
Scenario 2 - Havendale Bridge
The elusive order of Bloodmages - perhaps the only clan in existence powerful enough to steal from the gods - has moved its base of operations to the West, near Havendale, after storming the life druid sanctuary for reasons kept hidden. Junesbury was ill-trained in assaulting Bloodmage strongholds, but had a friend with a sword and stout heart. Kel Yi volunteered to travel West and find answers about the desert inscription and its Bloodmage trap. Hopefully, the warrior's long-standing friendship with the life druids could make a difference. Upon Arriving at Havendale, Kel Yi felt a mighty sense of fatigue. Blood magic was at work in this area - combat would be gruelling and difficult to recover from.
This map resembles Havendale Bridge. It teaches another of the Goatpersons hindrances - you do not refill your Health and Mana upon level-up. The Bridge Troll guarding the bridge cannot be bribed (and instead of the usual Sensation Stone, drops the "Forlorn"). Druids are pacifists and cannot be attacked, however upon speaking to them they disappear and grant XP to the heroine equal to their level. After revealing the boss, whenever you level up or kill a monster, all blood pools will be transformed into Barbing Bushes.
Player Character: Kel Yi the Elf Fighter
Preparations allowed: none (only the first Scenario allows preparations)
Monster difficulty: 100% (= Normal)
Fixed Elements: tbc
Boss: Trikkistix (75 Attack, 397 Health, Undead, Bloodless, Retaliate: Fireball, Physical Immune, Magical Attack)
Strategy: As Trikkistix is immune to physical damage, the most straightforward solution to ending him is using BURNDAYRAZ, and having enough health to tank his retaliate hits. As level-ups do not restore the player, it is recommended to engage him at the highest reasonable level (i.e. after having killed all desired monsters).
Kel Yi managed to gather enough druid survivors for a Bureucratic Council. Xenophobic as they were, they felt reluctant to share much knowledge. But they admitted that the Bloodmages probably knew at least a few of the Spider Script's secrets, placing dark magic upon its indestructible pedestal to kill off other knowledge seekers. They would not give up their findings peacefully.
Scenario 3 - Magma Mines
Kel Yi, though brave, was too broken to continue fighting. The pervading aura of blood magic has taken its toll, and now it was up to the newly-liberated life druids to strike at the Bloodmages directly. An attack was made on the Magma Mines, large and open enough to draw most of the attention while a lone druid known only as The Granite Wizard moved unseen into the depths of the cave...
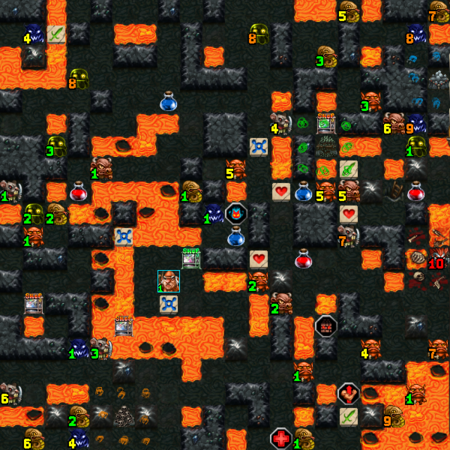
This map resembles Magma Mines. On top of the regular monsters it hosts Ratlings (Fast Regen, Retaliate: Fireball)
Player Character: Granite Wizard the Dwarf Wizard
Preparations allowed: none (only the first Scenario allows preparations)
Monster difficulty: 100% (= Normal)
Fixed Elements: tbc
Boss: Mance (form 1: 90 Attack, 190 Health, Revives; form 2: 75 Attack, 2500 Health, punishments as his health is depleted: <2000 Health Binlor Ironshield (resist wipe); <1000 HP Jehora Jeheyu (Poison + Mana Burn + Curse x3 + Corrosion x5 + Weakness x5 + reduce Health to 1 & Mana to 0); <500 HP Earthmother (Corrosion x10, petrify all creatures including plants); <250 Glowing Guardian (inventory wipe) )
Strategy: Mance can be very difficult to the unprepared. His divine punishments hurt every character severely. It is therefor advised to prepare for them in advance - by not relying overly on resistances; by having curing potions ready; by keeping any items on the floor that are intended to be used against post-GG punishment; and by, generally, having an abundance of resources to cleave though his health.
Would the Kingdom's Authorities believe this story? Whatever the Bloodmages learned in the desert has divine implications, and the only person outside their order with knowledge of those secrets is dead. Did the creature in these caves really bring the gods to their knees? Did it seal its own fate by abusing that power? Or was it just luck that saved our hero? This situation leaves the Kingdom with many warnings and few answers.
Triple Quest 2 - The Monster Machine
The.

