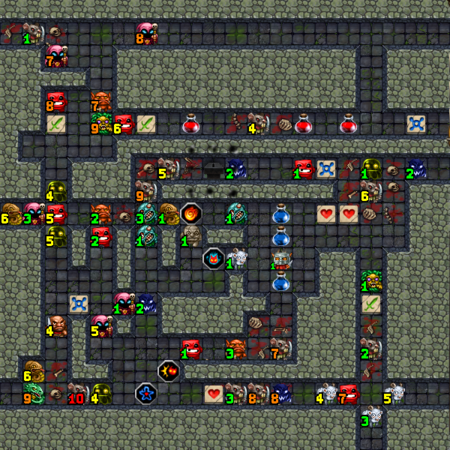
The Tattered Army
The Tattered Army dungeon is the ![]() Crusader gold challenge.
Crusader gold challenge.
Preparations
None allowed.
Resources Available
There are regular glyphs and shops. There are no subdungeons. There is one fixed altar, dedicated to ![]() The Pactmaker.
The Pactmaker.
Special Rules
First of all, you are not allowed to pick your race for this challenge - you are automatically playing a ![]() Goblin. The rest of the special rules of this dungeon are related to the bosses.
Goblin. The rest of the special rules of this dungeon are related to the bosses.
Monsters
This dungeon will host all unlocked monsters. Monster difficulty corresponds to Easy (-10% to monster Attack and Health scores).
Boss
The bosses are ten Ra'at Seids (![]() Ratling icon, Fast Regen, Retaliate: Fireball, Death Protection), one of each Level. See below for the damage and hp of all of the 10 bosses:
Ratling icon, Fast Regen, Retaliate: Fireball, Death Protection), one of each Level. See below for the damage and hp of all of the 10 bosses:
Lv1:2damage,4hp
Lv2:6damage,11hp
Lv3:10damage,19hp
Lv4:16damage,29hp
Lv5:22damage,40hp
Lv6:29damage,53hp
Lv7:37damage,68hp
Lv8:46damage,84hp
Lv9:56damage,102hp
Lv10:67damage,121hp
When you attack one of the Ra'at Seids, they might say the following: "Your bravery is admirable, Crusader, but it is your zeal that will win the day. Build up enough momentum to slice through your foes and show them the strenght of your convictions!" If your blow would have been enough to take out their Death Protection, then they will lose a bit of Attack power, as if they had triggered the Death Protection, however the Death Protection will not be depleted by this. This happens if you Momentum is too low. The threshold seems to be 30% - that is, if your current momentum is below 30%, you will not remove the Death Protection even if you completely deplete the Ra'at Seid's health; if you Momentum is 30%+, though, you will normally remove the Death Protection. Killing a Ra'at Seid that no longer has a Death Protection no longer seems to depend on Momentum level, and is feasible normally.
Strategy
Mandatory race: ![]() Goblin
Goblin
Ten bosses seem a lot, but individually all Ra'at Seids are quite weak. Nevertheless, you cannot leave the bosses for the end of the level, because you will not be able to build up enough momentum to kill all of them. So the recommendation is, explore the level, and go for higher-level kills whenever possible. Whenever your momentum is above 30%, strike down any Ra'at Seids you can. They are worth experience normally, and only the blow taking out the Death Protection checks your Momentum - you can, for example, strike a Ra'at Seid once or twice to bring him into range, then kill some other monsters to build the momentum, and once you have sufficient, land the "killing" blow that can take out the Death Protection. Note that low level bosses without death protection is nothing different from regular monsters and you may want to save them for building up momentum in the late game.
Around level 6, take ![]() Consensus and
Consensus and ![]() Scholar's Pact, this gives you an extra bit of attack power just after level-up, when you would normally be weaker due to your depleted
Scholar's Pact, this gives you an extra bit of attack power just after level-up, when you would normally be weaker due to your depleted ![]() MOMENTUM. Other boons may also work instead, for example
MOMENTUM. Other boons may also work instead, for example ![]() Warrior's Pact.
Warrior's Pact.
This level is actually not that hard if you know the key to killing the Ra'at Seids.
